Spyro Reignited Game Controls
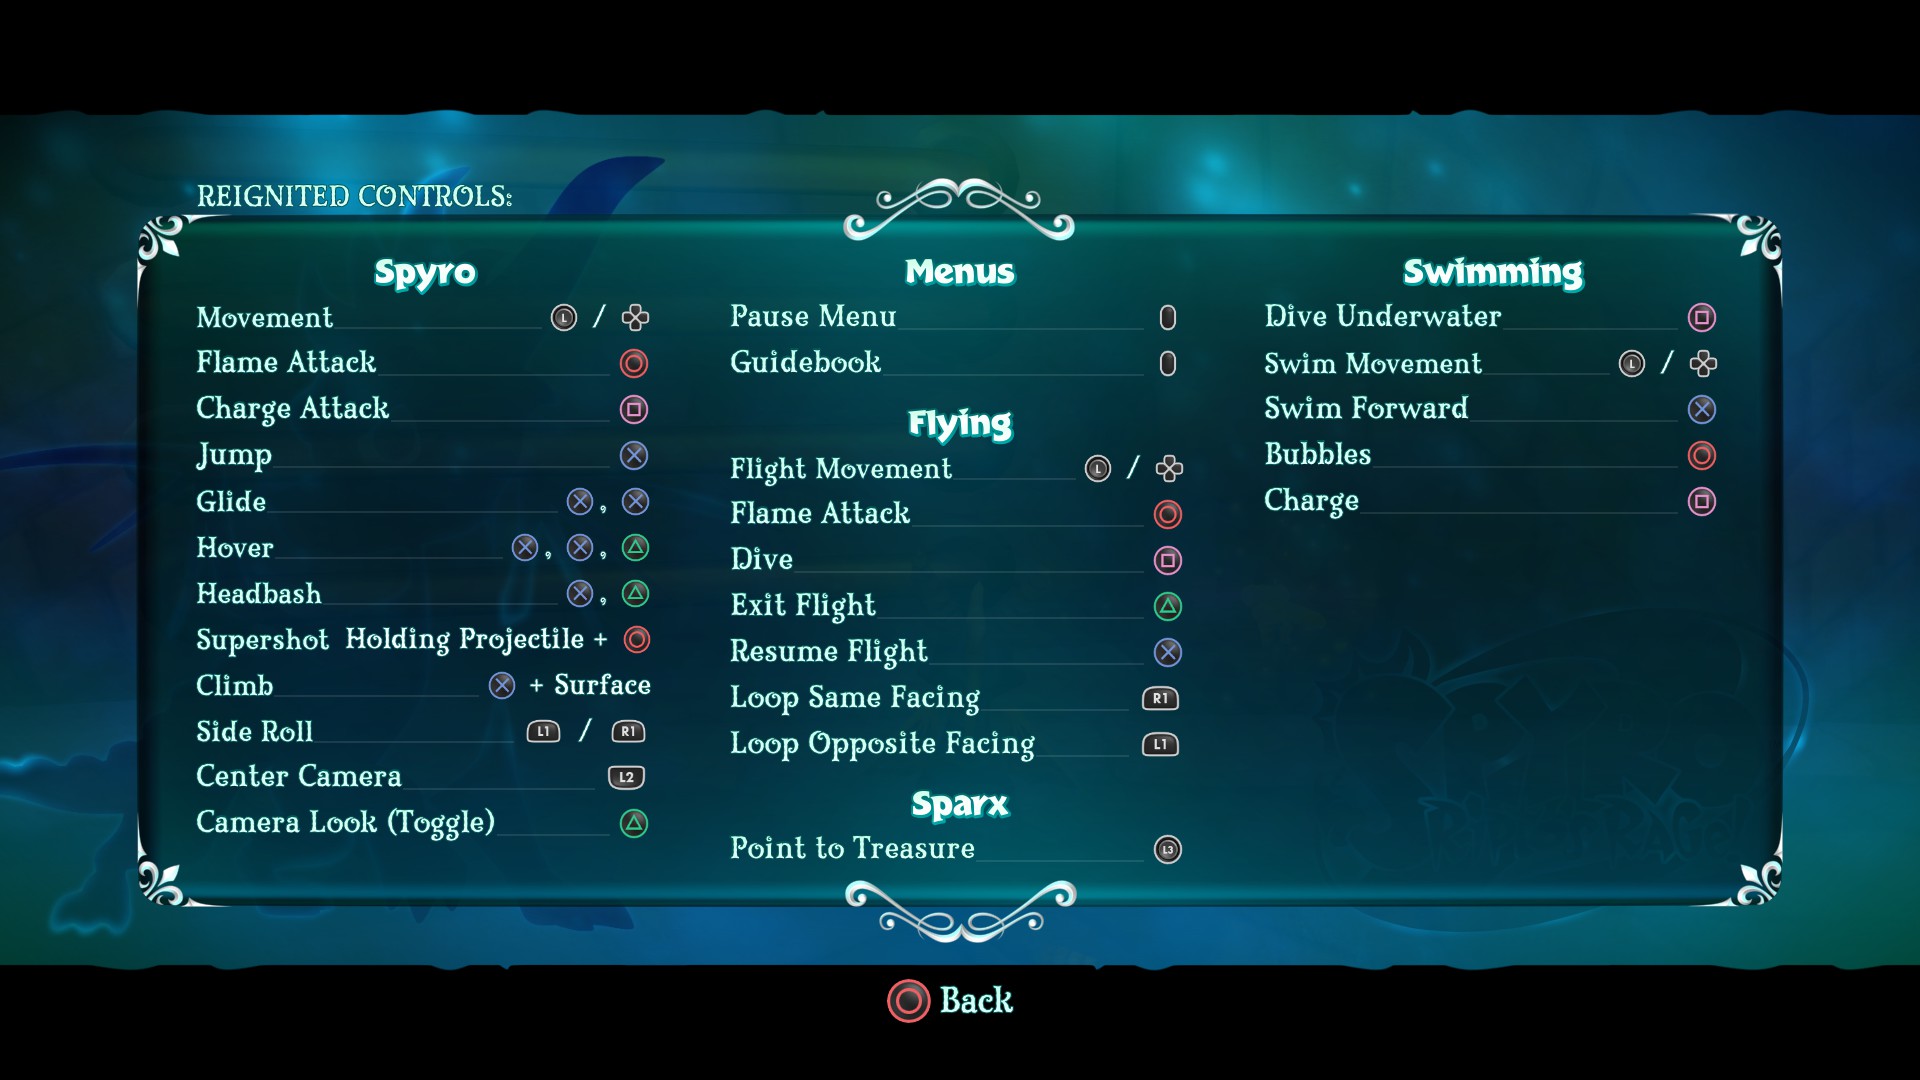
Spyro Reignited Trilogy Controls
Need a reminder of the controls for Spyro Reignited Trilogy? This guide covers Spyro’s basic movement and attacks, camera controls, flying, swimming and special abilities, along with the controls used in menus and Speedway levels.
The controls below cover PlayStation, Xbox, Nintendo Switch and PC. Some abilities are only available in certain games, and these are explained further down the page.
On This Page
Quick Controls
If you just need a quick reminder, these are the controls you’ll probably use most often:
| Action | PlayStation | Xbox | Nintendo Switch | PC |
|---|---|---|---|---|
| Move | Left Stick / D-Pad | Left Stick / D-Pad | Left Stick / D-Pad | WASD / Arrow Keys |
| Jump | X | A | B | Spacebar |
| Flame | Circle | B | A | Left Click |
| Charge | Square | X | Y | Left Shift / Right Click |
| Glide | X while airborne | A while airborne | B while airborne | Spacebar while airborne |
| Hover | Triangle while gliding | Y while gliding | X while gliding | F / Left Ctrl while gliding |
Basic Spyro Controls
| Action | PlayStation | Xbox | Nintendo Switch | PC |
|---|---|---|---|---|
| Move Spyro | Left Stick / D-Pad | Left Stick / D-Pad | Left Stick / D-Pad | WASD / Arrow Keys |
| Move Camera | Right Stick | Right Stick | Right Stick | Mouse |
| First-Person View | Triangle | Y | X | F / Left Ctrl |
| Flame Attack | Circle | B | A | Left Click |
| Charge Attack | Square | X | Y | Left Shift / Right Click |
| Jump | X | A | B | Spacebar |
| Glide | X while airborne | A while airborne | B while airborne | Spacebar while airborne |
| Hover | Triangle while gliding | Y while gliding | X while gliding | F / Left Ctrl while gliding |
| Spit | Circle | B | A | Left Click |
| Side Roll | L1 / R1 | LB / RB | L / R | Q / E |
Moving Spyro and the Camera
Use the Left Stick or D-Pad to move Spyro when playing with a controller. On PC, you can use either WASD or the Arrow Keys.
The camera is controlled using the Right Stick or the mouse on PC. This lets you look around the environment, check what is above or below you and get a better view before attempting a difficult jump or glide.
If you’re more comfortable with the camera from the original PlayStation games, take a look at the camera options. The Reignited Trilogy includes an alternative camera setting for players who prefer the original style.
Flame Attack
Spyro’s Flame Attack is one of his two main attacks. It can defeat many enemies as well as destroy baskets and other objects found throughout the levels.
Not everything is vulnerable to fire. Metal enemies and objects generally require a different approach, which is where Spyro’s Charge Attack becomes particularly useful.
Charge Attack
Charging sends Spyro racing forwards with his horns lowered. As well as attacking enemies, it’s a useful way to travel quickly across open areas and break objects that cannot be destroyed with fire.
Some larger enemies cannot be defeated simply by charging into them, and hitting a wall will bring Spyro’s charge to an abrupt stop.
Charging can also be combined with jumping to perform a Charge Jump. The extra momentum can help Spyro cover more distance than he would with an ordinary jump.
Jumping and Gliding
Press the Jump button to make Spyro jump. Holding the button slightly longer gives him more height, which is especially useful when preparing for a long glide.
To Glide, press the Jump button again while Spyro is in the air. Gliding is one of the most important skills in all three games and is frequently needed to reach platforms, collectibles and hidden areas.
Hover
While Spyro is gliding, press the Hover button to give him a short upward boost before landing. This little extra bit of height is often enough to reach a ledge that would otherwise be just out of reach.
You can still make small adjustments to Spyro’s direction while hovering, which can help when trying to land on a small platform.
Note: Hover is not available in Spyro the Dragon. The ability is introduced in Spyro 2: Ripto’s Rage!.
First-Person View
First-Person View lets you take a closer look at Spyro’s surroundings and can be particularly useful when you need to aim carefully.
When Spyro is carrying an object in his mouth, or when using Superflame, First-Person View provides a central aiming point to help line up your shot.
Spitting Objects
Spyro can pick up certain objects in his mouth simply by walking into them. Press the Flame Attack button while carrying one to spit it towards a target.
For distant or particularly small targets, switching to First-Person View can make aiming much easier.
Gem Pointer and HUD
| Action | PlayStation | Xbox | Nintendo Switch | PC |
|---|---|---|---|---|
| Gem Pointer | Press L3 | Press L3 | Press Left Stick | P |
| Display HUD | Press L3 | Press L3 | Press Left Stick | P |
Finding Missing Gems with Sparx
If you’re searching for those last few missing gems, Sparx can give you a helping hand. Press the Left Stick down like a button, or press P on PC, and Sparx will point towards the nearest gem.
It’s worth moving Spyro around a little if you’re not sure exactly where Sparx is pointing.
Remember that Sparx points towards the location of the gem rather than showing you the route needed to reach it. If the gems are locked inside a sealed chest, you’ll still need to work out how to open it.
In Spyro: Year of the Dragon, gems can sometimes be located in a separate section of a level. In these cases, Sparx may point towards the portal leading to that area.
Displaying the HUD
The same control can be used to display information such as your gem total, collected Dragon Eggs and remaining lives. If you’re taking part in a challenge that has its own counter, this information can also appear on the HUD.
Menu Controls
| Action | PlayStation | Xbox | Nintendo Switch | PC |
|---|---|---|---|---|
| Pause Menu | Options | Menu | Plus (+) | Escape |
| Guidebook | Touchpad | View | Minus (-) | Tab |
Pause Menu
The Pause Menu gives you access to the game’s options and other useful information. From here you can resume playing, check your progress and inventory, change settings or leave the current level.
If you’re playing a Speedway challenge, quitting your current attempt will end the run and return you to the scoreboard.
Guidebook
The Guidebook is an easy way to check your progress without leaving the game. It shows information about the level you’re currently exploring, including how many collectibles you’ve found and how much of the level you’ve completed.
You can also reach the Guidebook through the Pause Menu.
Spyro 2 Abilities
Spyro 2: Ripto’s Rage! introduces several new abilities that aren’t available in the first game. Spyro learns Swimming, Climbing and Headbash from Moneybags as he progresses through Avalar.
These abilities are available to Spyro from the beginning when playing Spyro: Year of the Dragon.
Swimming
| Platform | Dive / Charge |
|---|---|
| PlayStation | Square |
| Xbox | X |
| Nintendo Switch | Y |
| PC | Left Shift / Right Click |
Once Spyro has learned to swim, he can dive beneath the surface of suitable areas of water and explore underwater.
While underwater, holding the Charge button allows Spyro to swim quickly. Charging is also useful for breaking underwater objects and launching Spyro back out of the water. For a slower swim, use the Jump button.
In Spyro 2, Swimming is purchased from Moneybags for 500 Gems in Summer Forest, near the castle moat.
Climbing
Climbing doesn’t require a separate button. Once the ability has been learned, simply move Spyro onto a climbable ladder and he’ll grab onto it automatically.
You can then move along the climbing surface or use the Jump button to climb more quickly and leap towards another nearby ladder.
In Spyro 2, Climbing is purchased from Moneybags for 500 Gems in Autumn Plains.
Headbash
| Platform | Control |
|---|---|
| PlayStation | Triangle while airborne |
| Xbox | Y while airborne |
| Nintendo Switch | X while airborne |
| PC | F / Left Ctrl while airborne |
To perform a Headbash, jump into the air and press the appropriate button. Spyro will slam down into the ground beneath him.
The move can damage enemies, but it’s particularly useful for smashing rocks and opening the special chests that require a Headbash.
In Spyro 2, Headbash is purchased from Moneybags for 1,000 Gems in Winter Tundra, near the castle gates.
Flying and Speedway Controls
The flight and Speedway levels use some additional controls. Getting comfortable with them can make a big difference when you’re trying to complete every objective before the timer runs out.
| Action | PlayStation | Xbox | Nintendo Switch | PC |
|---|---|---|---|---|
| Flight Movement | Left Stick / D-Pad | Left Stick / D-Pad | Left Stick / D-Pad | WASD / Arrow Keys |
| Flame Attack | Circle | B | A | Left Click |
| Dive | Square | X | Y | Left Shift / Right Click |
| Exit Flight | Triangle | Y | X | F / Left Ctrl |
| Resume Flight | X | A | B | Spacebar |
| Loop-de-Loop | R1 | RB | R | E |
| Loop Flip | L1 | LB | L | Q |
Loop-de-Loop
Press the appropriate button while flying through a Speedway level to make Spyro perform a complete loop before continuing in the same general direction.
Loop Flip
The Loop Flip is useful when you need to reverse direction quickly. Spyro performs a looping turn and begins flying back in the opposite direction.
Both moves originally appeared in the first Spyro game and are available throughout the Reignited Trilogy.
Side Roll
| Platform | Roll Left / Right |
|---|---|
| PlayStation | L1 / R1 |
| Xbox | LB / RB |
| Nintendo Switch | L / R |
| PC | Q / E |
While Spyro is on the ground, the shoulder buttons allow him to roll quickly to the left or right.
Side Roll isn’t required very often during normal gameplay, so it’s an easy control to forget about. However, it can be useful for quickly moving out of the way of an attack without completely changing the direction Spyro is facing.
Reignited or Retro Controls?
The Reignited Trilogy offers options designed to make the controls and camera more comfortable for modern controllers, but players returning from the original PlayStation games may prefer a more traditional setup.
It’s worth checking the Options menu and experimenting with the available control and camera settings. If something doesn’t quite feel the way you remember it, changing these settings can make the game feel much closer to the original experience.