Angel Of Darkness PlayStation® 2 Controls
STARTING THE GAME
The game opens with starting credits and an intro movie. When prompted, press the ÷button to display the Main Menu, offering the following options.
MAIN MENU
NEW GAME — Prepare to join Lara on a brand new adventure.
LOAD GAME — Proceed to the Saved Game screen, where you can load a previously saved game. This option is only present if a memory card (8MB) (for PlayStation®2) containing previously saved Lara Croft, Tomb Raider: The Angel of Darkness™ game(s) is inserted in MEMORY CARD slot 1 at startup. Note: Only MEMORY CARD slot 1 is used to load and save game data for this game.
OPTIONS — View and use the Options Menu.
PAUSE / OPTIONS MENU
Press the ‘Start’ button to pause the game and display the Pause / Options Menu, featuring the following options:
AUDIO — Change the audio settings for:
Sound Mode — Stereo (default) / Dolby Pro Logic II, Music Volume, Speech Volume, Effects Volume
VIDEO — Adjust the position of the picture on your TV screen and choose a refresh rate.
SUBTITLES — Turn cutscene and FMV subtitles ON (default) or OFF.
BASIC CONTROLS
MENU CONTROLS
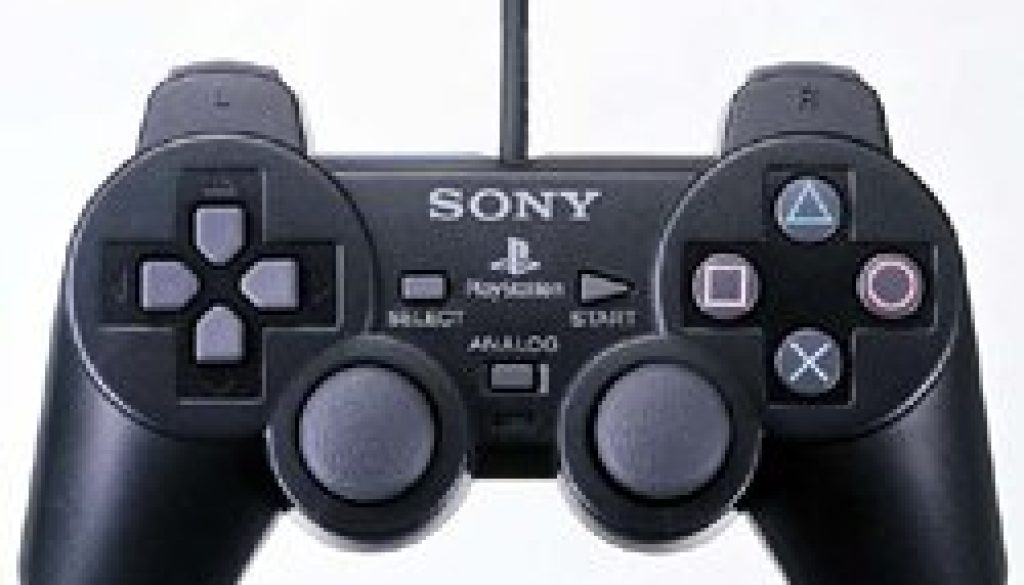
DIRECTIONAL BUTTONS / LEFT ANALOG STICK — Move through the menus.
X BUTTON — Make selections.
TRIANGLE BUTTON — Retreat back one menu level.
CUT SCENE / CONVERSATION CONTROLS
Follow the onscreen prompts throughout the movie cutscenes and conversations. Use the ≈button to speed up conversations and confirm prompts.
LARA’S SPECIAL MOVES
SWIMMING ON THE SURFACE
If Lara finds a deep pool of water, she can jump in and swim. Use the left analog stick to move Lara around on the surface of a pool and press ‘Circle’ (Jump) to stroke forward. At the edge of the water, press the left analog stick μand press the ‘X’ (Action) to climb out.
SWIMMING UNDERWATER
When swimming underwater, Lara can hold her breath for about a minute — any longer and she’ll become fish-food!
CLIMBING PIPES/LADDERS
To climb up drainpipes or ladders, walk Lara up to the object and move the left analog stick ‘Up’ make her climb onto the object. Then use the left analog stick to climb up or down and to dismount.
MONKEY SWINGING
Where the opportunity exists to Monkey Swing from bar to bar to cross a gap, position Lara under the first bar and press ‘Circle’ (Jump). When she’s holding onto the bar, move the left analog stick μto Monkey Swing forward. Press ‘X’ (Action) to dismount.
GENERIC ACTIONS
HAND OVER HAND
To jump onto a zip wire, position your character directly under it and press ‘Circle’ (Jump). Use the left analog stick to travel along the rope. Press ‘Triangle’ (Duck) to tuck your character’s legs up to rest or avoid objects.
JUMPING, GRABBING & SHIMMYING
To jump, press ‘Circle’ (Jump). To jump in a certain direction, move the left analog stick while jumping. Jumps onto ledges or rails over a great distance require a jump and grab. To perform this jump, press the Jump button while moving the left analog stick ‘Up’, release the Jump button, then at the apex of the jump press and hold ‘X’ (Action) until Lara or Kurtis grabs the ledge. You can then release the button. Use the left analog stick to shimmy along the ledge, and press ‘Up’ to climb up onto the ledge. Press the Action button to release the grab. Once the grab is activated, a Grab Bar appears onscreen to monitor your character’s energy. If the Grab Bar runs out, the character’s grip will loosen immediately!
GRAB BAR
Lara and Kurtis are very fit and strong but even they can’t hang from ledges indefinitely. When either one is grabbing a ledge, a Grab Bar appears and immediately begins to decrease. If it’s allowed to run out completely, the grab is released and the character lets go of the ledge. The bar is automatically refreshed with each grab.
LAST CHANCE GRAB
If your character begins to slide on the scenery, press ‘X’ (Action) to make the character grab onto something before falling.
INTERACTING WITH THE ENVIRONMENT
Lara and Kurtis interact with their worlds in different ways. One example of this is opening doors. Approach and stand by a door. When you are near enough to open it, a hand icon appears. Press ‘X’ (Action) to make your character try and interact with it — in this case by opening the door. You may want Lara or Kurtis to climb through windows or up onto boxes. To achieve this, walk your character up to the object. If the character can climb up or squeeze through the gap, he or she will do so automatically.
PUSHING / PULLING
Both Lara and Kurtis can push and pull certain objects. Position your character next to the object and press and hold ‘X’ (Action). Lara or Kurtis will then adopt a ready posture (if the object can be manipulated). Then, move the left analog stick ‘Up’ to push the object, or pull ‘Down’ to pull the object. Release the Action button to resume normal stance.
ATTACKING
Press ‘R1′ (Weapon) to draw the currently selected weapon from the Inventory. While the weapon is drawn, press’X’ (Action) to fire, or tap ‘Triangle’ (Target) to switch targets. Press the Weapon button again to holster the weapon. Both Lara and Kurtis are ready for a fist fight at any time. When an enemy is close by, tap the Action button once for a single punch, and twice for a double punch. Press the Action button firmly to kick.
STEALTH
To remain relatively undetected, both Lara and Kurtis can adopt a Stealth mode, which you toggle active/disabled by tapping the ßbutton (Stealth). Lara and Kurtis also have a silent neck-breaker move, activated by pressing the ≈button (Action) when your character is standing directly behind an unsuspecting enemy. While in Stealth mode, when your character is near a flat upright surface, press the Action button to hug the wall. Use the left analog stick to perform a leaninglook around a corner. Press the Action button again to resume your normal stance.
While in Stealth mode with a weapon drawn, move the left analog stick ‘Up’ to move forward in the direction your character is looking, move ‘Left/Right’ to sidestep, and pull ‘Down’ to step backward. Use the right analog stick to move the field of vision: as you move your character, your weapon will also move, enabling you to target manually. Stealth mode is designed for “silent-running.” Any enemies whose line of sight you cross will be instantly alerted to your presence. It’s also always a good idea to have a weapon drawn in Stealth mode just in case you are detected and need to resort to a more basic tactic!
CHARACTER STATUS BAR
Two different bars display the current state of Lara or Kurtis’s well being:
HEALTH BAR — When this bar depletes,Ms. Croft or Mr. Trent is no more! If Lara or Kurtis is poisoned or breathes in poisonous gases, the Health Bar will flash green and begin to drain away. Poisons can be treated by selecting a health item from the Inventory. Gas alerts are solved by leaving the area, if possible, or donning a respirator!
BREATH BAR — When Lara is swimming underwater, this bar will start to decrease. If it reaches zero, Lara’s Health Bar will appear, decreasing at the same rate. If Lara doesn’t reach the surface before it’s gone, she’s a goner!
PICK-UPS
Our heroes can retrieve objects and store them in their Inventory. Position Lara or Kurtis so that the object you want to gather is in front of the character’s feet. Press ‘X’ (Action) and Lara or Kurtis will pick it up. Often enemies drop items, so it’s always worth your time checking their bodies — just in case.
INVENTORY
Press the ‘Select’ button to display the Inventory. Use the directional buttons to navigate through the Inventory and press ‘X’ to select an item. Press the ‘Select’ button again to exit the Inventory and return to the game. Remember: Lara and Kurtis each have their own Inventory, and neither has access to the other’s items. The Inventory sections are:
SAVE — View Save Game options.
LOAD — View Load Game options.
WEAPONS — This area holds all the weapons that Lara and Kurtis collect during their adventure. Highlight a weapon and press ‘X’ to use it. Certain weapons can be loaded with different types of ammunition. When these weapons are highlighted, a sub-option appears allowing you to combine alternate ammunitions. Follow the onscreen instructions that guide you through the re-arming process. Initially Lara has no weapons and the only weaponry available is her hand to hand combat skills.
ITEMS — All the items and artifacts Lara and Kurtis collect are placed into this section. Highlight an item and press ‘X’ to use it. At the start of the game, Lara has only a bloodstained fax as a clue.
HEALTH — Many items that Lara and Kurtis collect are health related, such as antidotes, bandages and standard medi-packs. All these items are placed in this section. Health pick-ups restore a character’s health level to different degrees. Highlight an item to display the level of healing. Press ‘X’ to carry out its treatment. Lara starts her adventure with two bandages.
VON CROY’S NOTEBOOK
While in Paris, Lara will come across Werner Von Croy’s notebook. When she collects it, the notebook is added as a new option in the Inventory. The notebook contains hints, tips and reminders — refer to it often since the information it contains updates and is priceless! To access the book, call up the Inventory screen and select NOTEBOOK. Use the ‘Up/Down’ directional buttons to highlight a section on the contents page and press the ≈button to display it. Use the ‘Left/Right directional buttons to turn pages. Press ‘Triangle’ to close the notebook.
SAVE GAME
You must have a memory card inserted into MEMORY CARD slot 1 to save your game. To save the game at any point, display the Inventory and select SAVE GAME. Select a save game slot and press ‘X’. Your save game file will be named automatically. You can save up to eight games. To save more games, select an older file to overwrite and press the ≈button (or insert a different memory card before saving).
LOAD GAME
To load a previously saved game, you must have a memory card containing a previously saved Lara Croft, Tomb Raider: The Angel of Darkness™ game(s) inserted in MEMORY CARD slot 1 at startup. Then, open the Inventory, select LOAD GAME, highlight the saved game you want to resume and press ‘X’ to complete the load. Note: Only MEMORY CARD slot 1 is used to load and save game data for this game.

